~ Small Handbag Tutorial ~
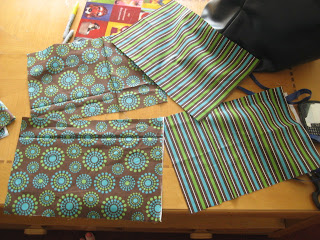
I started with a 1/4 yd each of two fabrics that had the same colors, but were very different patterns.
I cut 2 pieces from each that were 13" x 9".
I took a pieces of the material I was using for the main part of the bag
and set it on top of one of the pieces I was using for the top of the bag.
Then I folded the bottom of the material up about 3/4 of the way.
Then I took the bottom part of the material on the bottom and folded it up to meet the top.
Now you should have 3 layers at the top pinned together.
(careful not the get the bottom of the main piece in there)
After I turned the side outside right it looked like this.
I did the same thing for the other side and then pinned them together right side in.
I sewed around the sides and bottom, leaving the top open.
and the puppies were watching the street sweepers.
With the bag still inside out, I measured 2" from the corner and drew a line. I sewed just to the inside of the line so that you can't see the marker when you flip it right side out.
Do this for both corners.
Then I cut the corner off, about a 1/2 "from the seam.
This is what the bottom of the bag should look like from the inside.
Then I turned the bag right side out. (I did not put a liner in this bag, you can if you so choose)
I took the remaining fabric from the material I used for the top portion of the bag
and cut it down the middle length wise.
I folded each piece in half, wrong side out, and sew along edge. Turn right side out.
About 2 1/2" from the edge I sewed the handles. Folding the end under and sewing a square.
I sewed mine to the inside of the top of the bag, but you can also sew them to the outside. It all depends on what kind of look you are going for.
After I trimmed all the loose threads,
I sewed these buttons to the center of each square where the handles attach.
And there you have it!


No comments:
Post a Comment