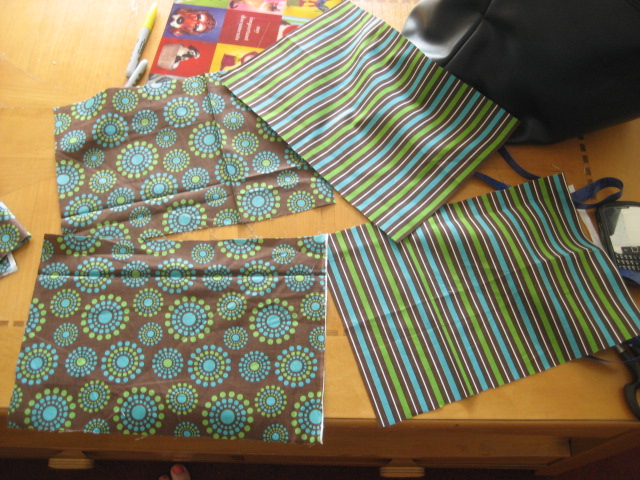
With summer on its way (and it being really hot here in Texas already) I thought I would try making a beach bag. This one I did by the pattern using Simplicity #2830 A. It has been quite a while since I used a pattern I didn't make so I had some seam ripping to do as well. (trial and error) I have not received my sewing equipment in the mail yet, but I did borrow a friend's machine and use some fabric my mother-in-law had shipped me. Here is how it came out:
I love that it has 6 pockets for sunblock, water bottle, ipod, keys, sunglasses, and what ever else you need, plus room in the main pocket for a towel and t-shirt. This bag and more are available on my website and facebook.
Monday, April 30, 2012
Saturday, April 14, 2012
Galeo
The move has gone well so far. (although the moving of stuff is slow, hey less to clean up) We have come to enjoy the slow paced town and people here. New jobs are already lined up and we're looking at options for a place of our own. In the sadness of losing our dog Rhuarc, we decided to adopt a new puppy.
Meet Galeo:
He will never take Rhuarc's place, but has new special place in my heart. (I mean come on look at that face) Galeo is a coffee term (espresso with milk) which is perfect since I spend most of my mornings at the coffee shop learning drinks and doing the baking. I'm excited to bring out some of the recipes I've recently learned and put them to good use. My sewing equipment and fabric should be in the mail soon so that I can fill all these orders and continue with tutorials.
Until next time,
-SL
Sunday, April 8, 2012
Its Not Just for Sewing
Trial and Error. Its not JUST for sewing or baking.Sometimes its about life. We try new things and hope that they come out great, and when they don't happen the way we had hoped we simply must learn from the experience and try again next time. Recently through the projects in this blog I started selling my own "Custom and Handmade Bags". Business was taking off faster than I could have ever hoped. Honestly I wasn't really even trying to start a small business, I was just trying to keep from getting bored in my little city apartment. Then out of the blue we had an emergency move. By emergency I mean it happened very fast and I never got the chance to go home and get all my belongings. Instead, a friend of mine packed the important things and sent the rest to Goodwill. We even had to have someone take our dog to the Humane Society (Yes, that cute lab-mix that "helped" with some of the projects) Now, I live on the other side of the country with nothing to my name but the dufflebag full of clothes I had brought with me on our vacation. Trial and Error. Sometimes we try to do something and it doesn't happen how we had thought it would, so we pick up the pieces and learn from what we did. Was it wrong? Should we have done it differently? Is this bad? No. Its just part of life. Its the beauty of life.
This isn't the end of my Handmade Bags or my blog. Those will continue in some way, just not the way I had originally thought. Perhaps they will become even better. So, roll with the punches; learn from experiences; and never let go of your dreams.
-Stacie Lee
This isn't the end of my Handmade Bags or my blog. Those will continue in some way, just not the way I had originally thought. Perhaps they will become even better. So, roll with the punches; learn from experiences; and never let go of your dreams.
Saturday, March 24, 2012
Handles
I tried this new bag pattern today. It uses pre-made handles (like the kind you buy at the craft store). I think I like the way it turned out. It is basically a square of two kinds of fabric sewn together (so it makes one square with the good side of each fabric showing and backsides sewn together). The corners of the fabric get put through the loops on the bottom of the handles, and held in place with an elastic. Then put ribbon over the elastic. Gather the material on the top sides, then add a clasp to the middle.
I know those aren't very detailed instructions, but it can you give a basic idea.
Play with it. You can always create new things from basic ideas.
Thursday, March 22, 2012
A Bag for Me
I finally decided that I needed to make a bag for me. Looking at all these cute purses and bags made me a little jealous :) So I made this small pleated purse. The fabric is really amazing. I used two types of black and white pattern fabric for the outside and a nice teal for the inside. I used a larger version of this patten for the main body of the bag (from Pleated Pouch Tutorial at skiptomylou.org).
Then the strap was 16" x 1 1/4" (after sewing).
I really like how it came out. I also added a pocket to the inside that could fit my cell phone or lipgloss and Tylenol. I really don't carry a lot usually, so this size was perfect.
Soon I will show you how I make the pockets for the inside of my bags.
Wednesday, March 21, 2012
Knot Side Bag (instructions)
~ Knot Side Bag ~
I made this as a easy going beach type bag. You can alter it in many ways to make it fit your style.
Here is how I made it.
Here are the measurements for the main part of the bag. (see picture above)
Total bag: Width 13" Height 29" Straps: 2" x 16". I used a paper plate to make the round part.
You will need 2 pieces of both the liner and outside fabric.
I cut on a fold so I didn't have to sew the one side.
Sew all the way around the outside of each set. Forming two "bags" that open at the top.
Then I cut out two pieces from the outside fabric. They are 7" x 1 1/4".
I sewed these in side out and then flipped them right side out.
(If you have a crochet hook it will be helpful in turning these right side out. )
Next I took the liner and put it around the outside fabric with both good sides facing together.
I pinned the little tie we made earlier in the middle of the scoop.
Then sewed from the top and down around and up the other side.
I continued to do the same thing to the other side.
I sewed across the top of the strap on one side, down, across, and back up.
Stopping before I sewed across the other top of the strap.
Then I pulled the bag right side out through the little hole in the top of the strap.
I then pinned and sewed the opening in the top of the strap closed.
Trim loose thread, tie the straps in a knot (it looks almost like a bow)
and knot the little ties that keep the bag shut.
All Done!
Like I said, I wanted this to be a chill beach bag. You can sewed around the edges if you want a more crisp look. Also you can replace the ties with a snap, zipper, or magnet. Use your imagination!
Tuesday, March 20, 2012
Small Handbag Tutorial
~ Small Handbag Tutorial ~
I started with a 1/4 yd each of two fabrics that had the same colors, but were very different patterns.
I cut 2 pieces from each that were 13" x 9".
I took a pieces of the material I was using for the main part of the bag
and set it on top of one of the pieces I was using for the top of the bag.
Then I folded the bottom of the material up about 3/4 of the way.
Then I took the bottom part of the material on the bottom and folded it up to meet the top.
Now you should have 3 layers at the top pinned together.
(careful not the get the bottom of the main piece in there)
After I turned the side outside right it looked like this.
I did the same thing for the other side and then pinned them together right side in.
I sewed around the sides and bottom, leaving the top open.
and the puppies were watching the street sweepers.
With the bag still inside out, I measured 2" from the corner and drew a line. I sewed just to the inside of the line so that you can't see the marker when you flip it right side out.
Do this for both corners.
Then I cut the corner off, about a 1/2 "from the seam.
This is what the bottom of the bag should look like from the inside.
Then I turned the bag right side out. (I did not put a liner in this bag, you can if you so choose)
I took the remaining fabric from the material I used for the top portion of the bag
and cut it down the middle length wise.
I folded each piece in half, wrong side out, and sew along edge. Turn right side out.
About 2 1/2" from the edge I sewed the handles. Folding the end under and sewing a square.
I sewed mine to the inside of the top of the bag, but you can also sew them to the outside. It all depends on what kind of look you are going for.
After I trimmed all the loose threads,
I sewed these buttons to the center of each square where the handles attach.
And there you have it!
Subscribe to:
Posts (Atom)